- Step 1: Understanding the Two Types of WordPress
- Step 2: Choosing Hosting for Your WordPress Site
- Step 3: Setting Up Your Domain Name
- Step 4: Installing WordPress
- Step 5: Installing a Theme and Plugins
- Step 6: Choosing a Website Template
- Step 7: Customizing with Elementor
- Step 8: Adding New Pages
- Step 9: Updating the Navigation Menu
- Step 10: Editing the Header and Footer
- That’s It!
Hey there, my name is Ian, and in this blog, I’m going to walk you through the easiest and most effective way to create a professional WordPress website.
This is a beginner-friendly, step-by-step tutorial. No prior experience with WordPress or website building is required—I’ll guide you through every detail. By the end of this guide, you’ll have your very own WordPress website up and running.
We won’t write a single line of code. Instead, we’ll use Elementor, the most popular drag-and-drop page builder for WordPress. We’ll also use a free theme and free plugins—the only cost involved will be web hosting, which I’ll show you how to obtain for as low as $ 3 per month. Plus, I’ll help you access hundreds of customizable, mobile-friendly templates to kickstart your website design.
Step 1: Understanding the Two Types of WordPress
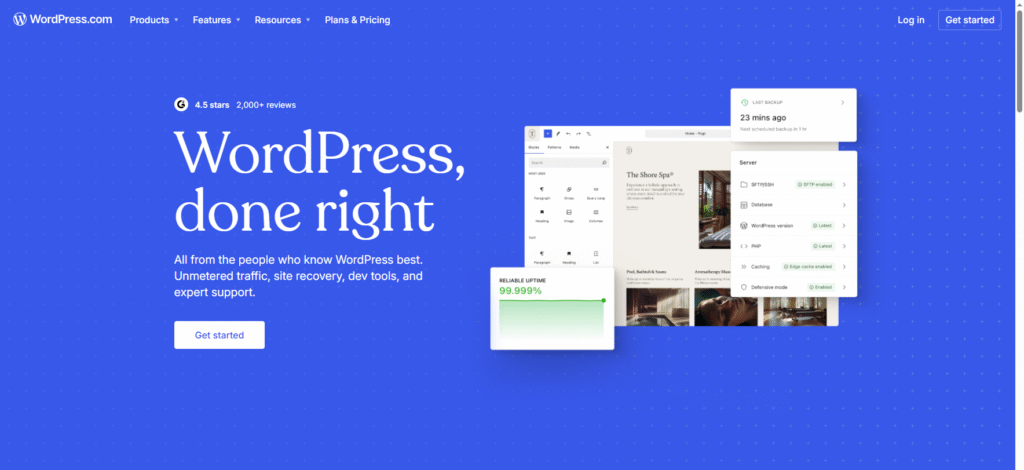
Before we dive in, it’s important to understand the difference between WordPress.com and WordPress.org to avoid costly mistakes.
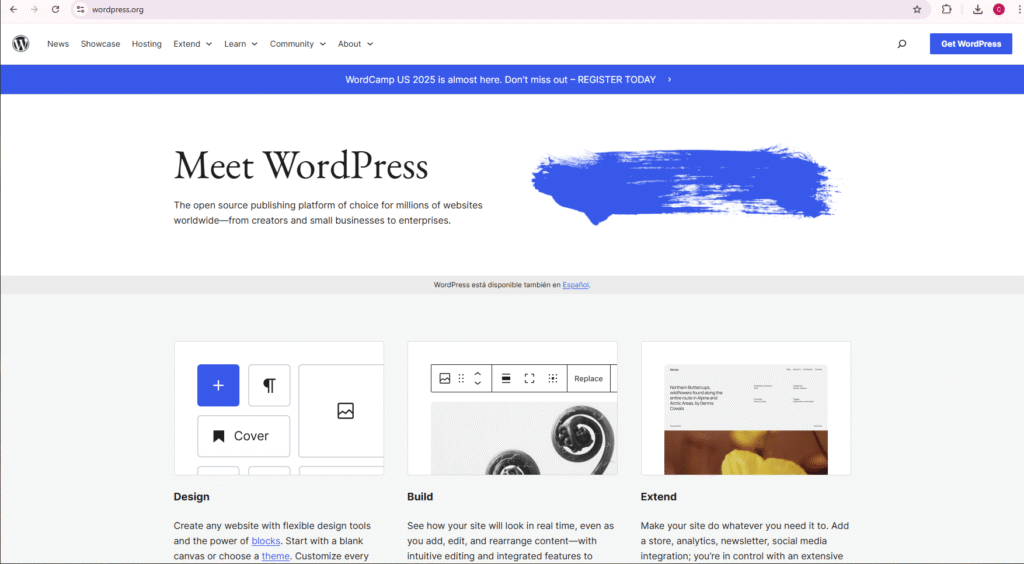
WordPress.org is where you can download the free, open-source WordPress software. You’ll install this on your hosting provider to create a fully functional website with complete control.
WordPress.com, on the other hand, is a for-profit company offering paid website plans with significant limitations unless you subscribe to their expensive Business Plan (around $40/month).
My recommendation: Use WordPress.org and choose your affordable hosting. This way, you get full access to plugins, themes, and customization—without breaking the bank.
Step 2: Choosing Hosting for Your WordPress Site
Hosting is simply renting space on a server where your website files will live, accessible 24/7.
WordPress.org lists several hosting providers, including Bluehost, Hostinger, and DreamHost. I recommend Hostinger because it’s affordable, beginner-friendly, and reliable.
To get started:
Go to my Hostinger partner link (hostinger.com) to access an exclusive discount. Click Start Now.
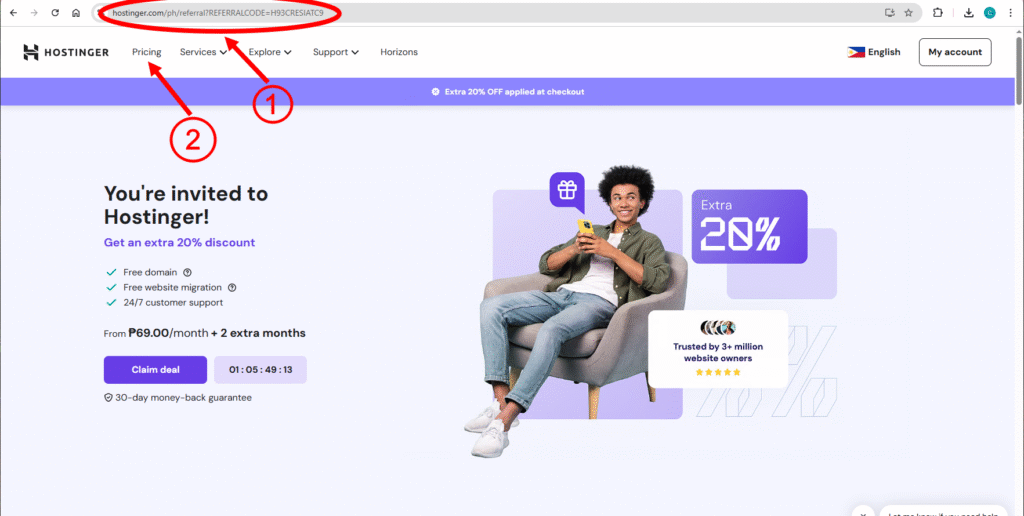
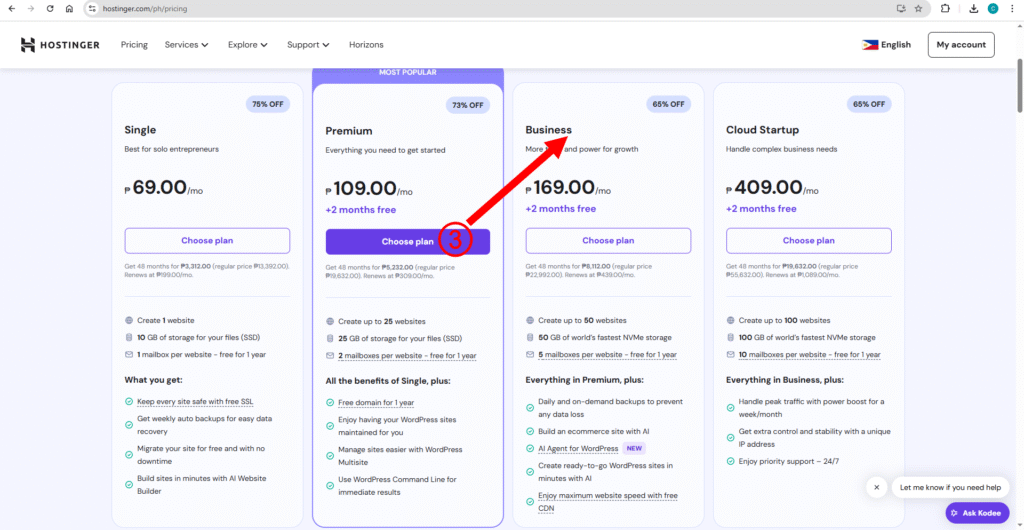
Choose either the Premium or Business hosting plan. I recommend the Business Plan for improved performance, speed, and storage, plus it includes a CDN for even faster global loading.
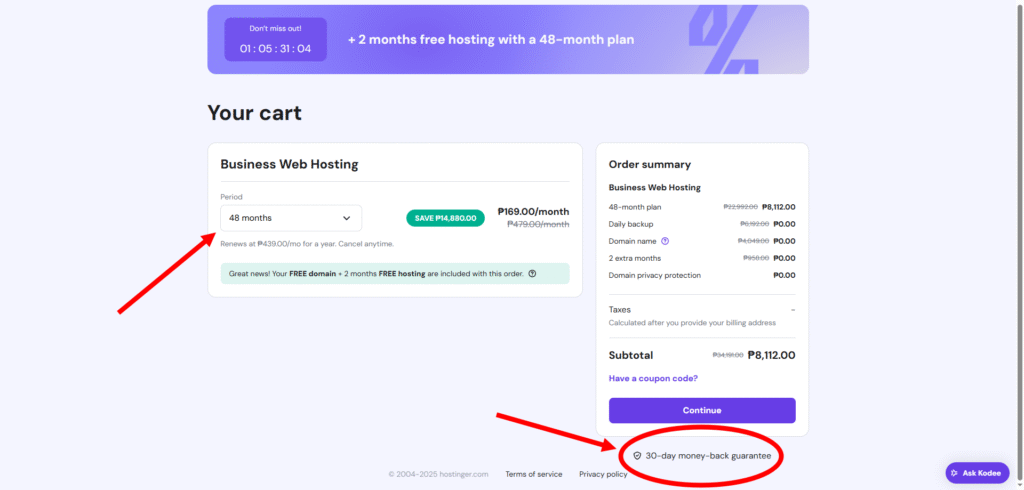
Select your preferred payment period. Longer plans (like 48 months) offer the best value. Apply my discount code: H93CRESIATC9 for an extra 20% off.
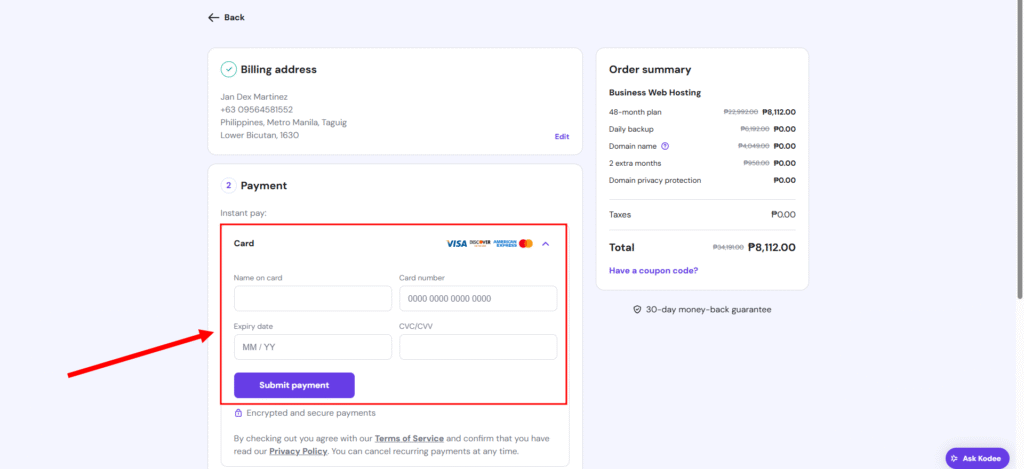
Create your account, fill up the necessary information, and complete the secure payment. You’ll also get a 30-day money-back guarantee, so you can try it risk-free.
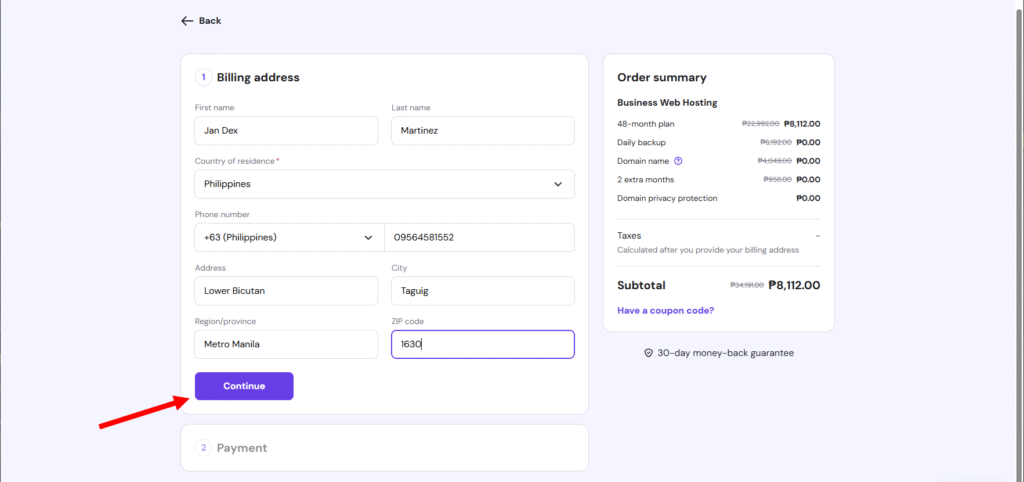
Step 3: Setting Up Your Domain Name
After purchasing hosting:
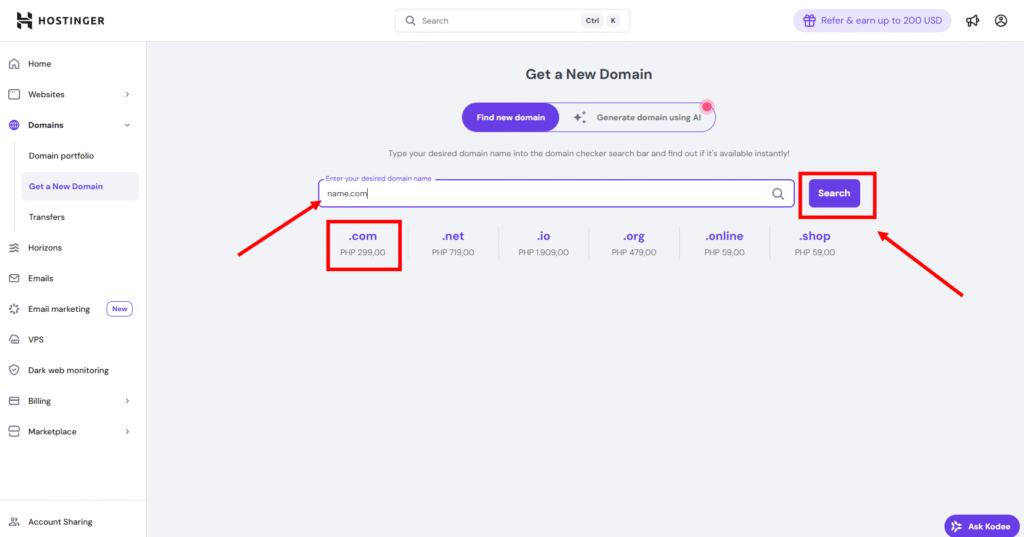
- Go to your Hostinger dashboard and click Claim Domain.
- Choose a domain (e.g., yourname.com or yourbusiness.com). Stick with .com if possible—it’s more recognizable and professional.
- Enter your contact details and verify your domain via email.
Once verified, your domain will be active and ready to use.
Step 4: Installing WordPress
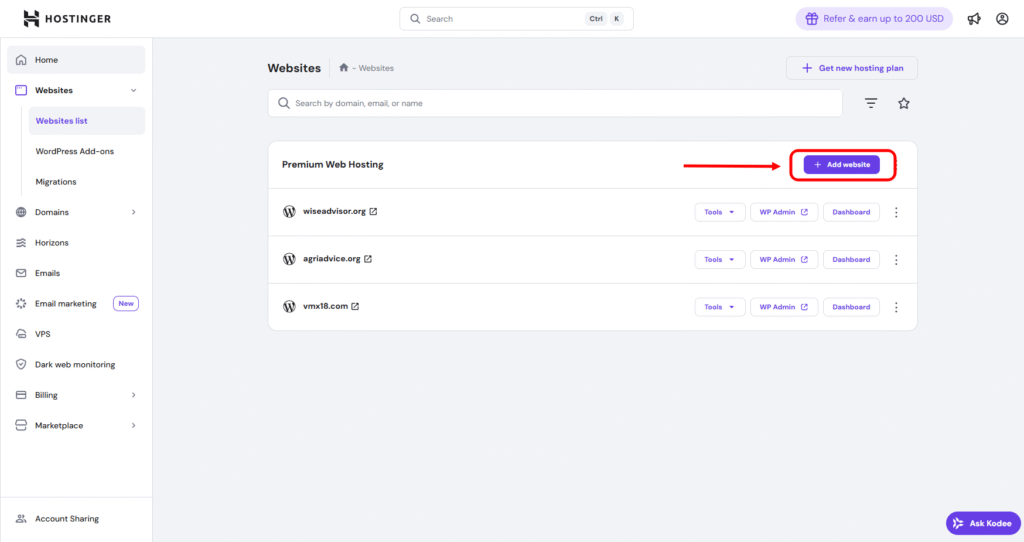
In your Hostinger dashboard, click Add website under your hosting plan.
Now it’s time to install WordPress:
- In your Hostinger dashboard, click Add website under your hosting plan.
- Choose to Create a Website, then select WordPress as your platform.
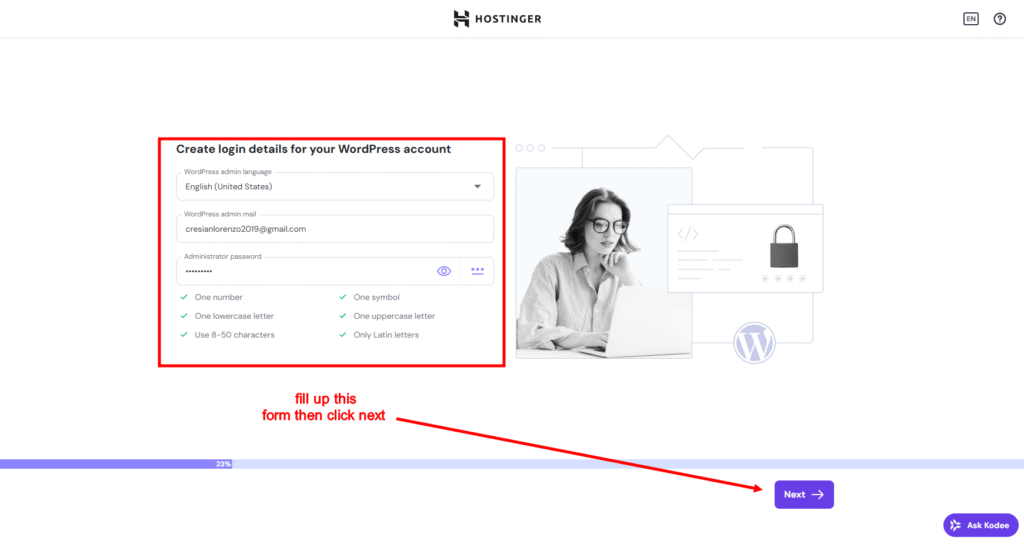
- Enter your email and password to create your WordPress login.
- Choose Create Blank Site.
- Select your domain and server location (choose one close to your target audience).
- WordPress will now install and take you to the dashboard.
If not, you can always access your dashboard by going to:yourdomain.com/wp-admin
Step 5: Installing a Theme and Plugins
1. Install Astra Theme:
- Go to Appearance > Themes > Add New.
- Search for Astra, then click Install and Activate.
- Astra is fast, flexible, and works perfectly with Elementor.
2. Install Starter Templates Plugin:
- Go to Plugins > Add New.
- Search for Starter Templates, then install and activate.
- This gives you access to hundreds of pre-built website templates.
3. Remove Unnecessary Plugins:
- Deactivate and delete any plugins you don’t need (e.g., Hostinger AI, Easy Onboarding).
- Keep only useful ones like Starter Templates and optionally LiteSpeed Cache (activate later for better performance).
Step 6: Choosing a Website Template
Now let’s design your site with a beautiful, ready-made layout:
- Go to Appearance > Starter Templates > Get Started.
- Choose Elementor as your page builder.
- Browse templates by category (e.g., portfolio, restaurant, business).
- Select a free template, customize fonts/colors, and click Import.
Once imported, your full website is live and looks great—home, about, contact, and more.
Step 7: Customizing with Elementor
To start editing:
- Visit your website while logged in and click Edit with Elementor from the top bar.
- Or go to Pages in your dashboard and select Edit with Elementor under any page.
Basic Editing Tips:
- Click any element to edit it (text, buttons, images).
- Use the left panel to make changes instantly.
- Drag and drop new elements from the Elementor widget panel.
- Click Publish to save changes.
Step 8: Adding New Pages
To create a new page:
- Click New > Page from the top menu.
- Name your page (e.g., “Our Team”) and click Publish.
- Click Edit with Elementor and begin building your page.
- Use Templates > Blocks to insert pre-built layouts (e.g., team sections).
Step 9: Updating the Navigation Menu
To add your new page to the menu:
- Go to your website and click Customize at the top.
- Navigate to Menus > Main Menu > Add Items.
- Add your new page and click Publish.
Step 10: Editing the Header and Footer
From the Customize screen:
- Click the pencil icon on your header or footer to change logos, contact info, and social links.
- You can also upload your favicon and adjust general settings from the same panel.
That’s It!
You now have a fully functional, mobile-friendly, and professional-looking WordPress website—no coding, no design experience needed.
If you want a more in-depth guide on customizing every section with Elementor, check out the next video/blog post.
Thanks for reading, and I’ll see you in the next tutorial!


