
If you want to create your own website, blog, or online store, you need a good web host. Hostinger is a popular choice. It offers fast, reliable, and affordable hosting services. In this article, you will learn how to get started with Hostinger in easy steps. This guide is perfect for beginners and simple enough for kids to understand.
Before we start, here is the link to Hostinger you can use:
Hostinger Official Website.
What Is Hostinger?
Hostinger.com is a web hosting company. It helps people put their websites online. They offer many types of hosting:
Whether you are a beginner or an expert, Hostinger has options for you. It is known for:
- Fast website speed
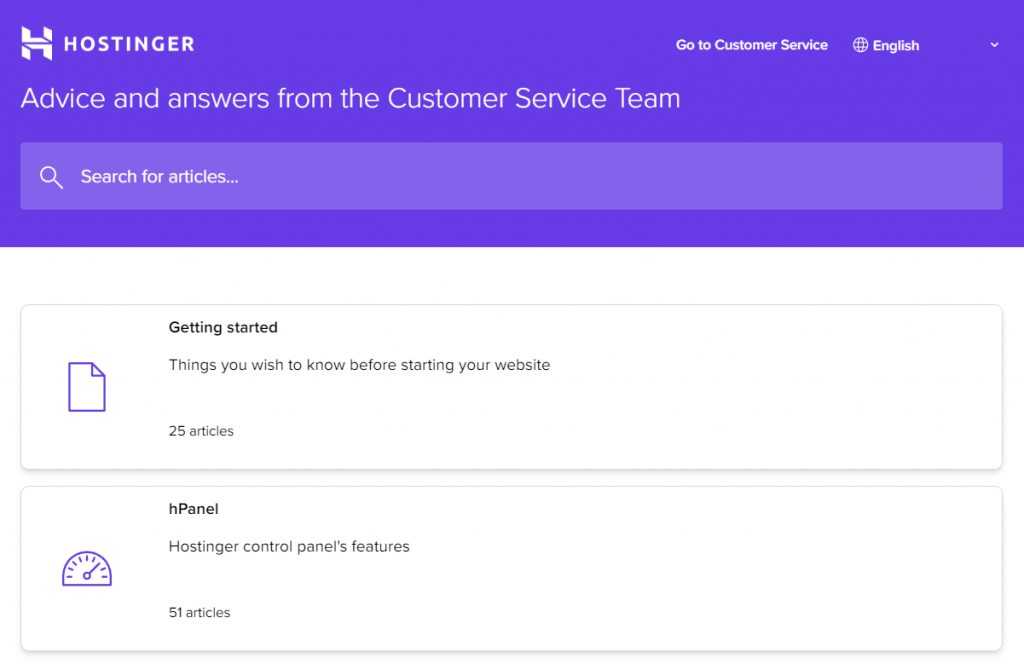
- Easy-to-use control panel called hPanel
- 24/7 customer support
- Affordable prices
Why Choose Hostinger?
Choosing Hostinger is smart because it makes website building easy and cheap. Here are some benefits:
| Feature | Benefit |
|---|---|
| Fast Website Performance | Your site loads quickly for visitors |
| User-Friendly hPanel | Easy management of your hosting and website |
| Domain Registration | Get your own website name easily |
| Drag-and-Drop Website Builder | Create pages without coding skills |
| 24/7 Support | Help is always available when needed |
| Affordable Pricing | Save money while building your site |
Credit: www.hostinger.com
How to Get Started With Hostinger in 7 Simple Steps
Follow these steps to launch your website using Hostinger.
Step 1: Visit Hostinger’s Official Website
Go to Hostinger.com. You will see different hosting plans and options.
Step 2: Choose The Right Hosting Plan
Hostinger offers many plans. For beginners, Shared Hosting or WordPress Hosting is great.
- Shared Hosting: Cost-effective and good for small websites.
- WordPress Hosting: Optimized for WordPress blogs and sites.
Pick the plan that fits your needs and budget.
Step 3: Register A Domain Name
Your domain is your website’s address on the internet. Hostinger lets you register a domain name easily.
Try to pick a name that is simple, memorable, and related to your site’s topic.
Step 4: Create An Account
Sign up with your email address or social account. This account manages your hosting and website.
Step 5: Make Your Payment
Hostinger accepts many payment methods. Choose the one convenient for you and complete the purchase.
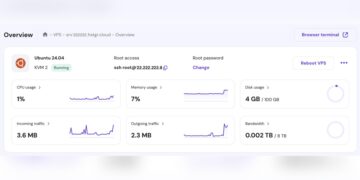
Step 6: Access Hpanel
After payment, log in to Hostinger’s hPanel. This dashboard helps you manage your website easily.
From hPanel, you can:
Step 7: Build Your Website
Use Hostinger’s drag-and-drop website builder or install WordPress.
- Add pages like Home, About, and Contact
- Upload images and text
- Customize colors and fonts
You don’t need to know coding. Hostinger makes it simple.

Credit: www.youtube.com
Tips for New Hostinger Users
Here are some helpful tips to get the most from Hostinger:
- Check tutorials: Hostinger has many guides and videos.
- Use 24/7 support: Contact support if you get stuck.
- Keep your passwords safe: Use strong, unique passwords.
- Back up your website: Regular backups keep your data safe.
- Choose the right plan: Upgrade if your site grows.
Common Questions About Hostinger
| Question | Answer |
|---|---|
| Is Hostinger good for beginners? | Yes, it’s very beginner-friendly with easy tools. |
| Can I host a blog on Hostinger? | Absolutely! It supports WordPress and other platforms. |
| Does Hostinger offer website builders? | Yes, a drag-and-drop builder is available for free. |
| Is Hostinger reliable? | Yes, it offers 99.9% uptime and fast speeds. |
| Can I get help anytime? | Hostinger’s customer support is 24/7 via chat. |
Conclusion: Start Your Website Journey with Hostinger Today
Now you know how to get started with Hostinger. It is a smart choice for anyone wanting a fast, affordable, and easy way to build a website.
Whether you want a blog, online store, or business site, Hostinger has the tools to help. Its user-friendly interface and helpful support make it perfect for beginners. Plus, the affordable plans keep your costs low.
Don’t wait! Visit
Hostinger Official Website now and start building your website today!
Frequently Asked Questions
What Is The First Step To Start With Hostinger?
Create an account on Hostinger’s website and choose a hosting plan.
Which Hostinger Hosting Plan Suits Beginners Best?
Shared hosting is ideal for beginners due to its simplicity and low cost.
How Do I Register A Domain On Hostinger?
Use Hostinger’s domain search tool to find and buy your domain.
Can I Build A Website Without Coding On Hostinger?
Yes, Hostinger offers a drag-and-drop website builder for easy site creation.
How To Access Hostinger’s Customer Support?
Contact Hostinger’s 24/7 support via live chat or support ticket system.
What Payment Methods Does Hostinger Accept?
Hostinger accepts credit cards, PayPal, and several local payment options.